- Tips & Tricks
- Apr 21, 2022
A Guide to Removing Background from Passport Photos

Passport photos must adhere to strict guidelines, particularly when it comes to the background. Unfortunately, many people cannot afford to visit a photo studio, so we’ve put together a step-by-step guide on how to take your own passport photo in the comfort of your own home.
US, European, & China Passport Photo Requirements
Before discussing the steps on how to remove background from passport photos, you first need to be aware of the US, European and China passport photo requirements.
Here are the detailed guidelines:
US
These are the requirements for US passport photos:
- 2″ x 2″ size
- White background
- 1-1 ⅜” head
- Color printed on photo paper
- Taken within the last 6 months
European
European passport photos have slight differences from the standards of the US. These are its requirements:
- 3.5 cm x 4.5 cm size
- Gray or white background
- 70% to 80% of the photo must be of your head
- Color printed on photo paper
- Taken within the last 6 months
China
For China, the passport photo requirement is very similar to the US and Europe. These are its requirements:
- 48 mm x 33 mm size
- 15 mm width of the head
- 28 mm to 33 mm head height
- White background
Other Guidelines When Taking Passport Photos
Other than knowing the photo paper, background, and size requirement of passport photos for the US, UK, and China, there are other requirements that also have to be followed. These include the following:
- Facial Expression

Unlike school IDs, where you have to show your best smile, passport photos are the complete opposite. Your facial expression must be neutral. This means that you should avoid squinting or trying to make your eyes look bigger or smaller. You should also refrain from curling the corners of your lips into a smile.
As much as possible, keep a straight face and look straight into the camera. This might be difficult to do, so try practicing it with a mirror first before taking your photo. Or, you could also try doing multiple shots until you’re satisfied.
- Pose
Sure, you might want to look good when taking your passport photo. In order to do this, you might want to show your best angle. However, there’s a standard pose that should be followed in these photos.
You must be directly facing the camera, showing your full face. Your head should be straight, and your shoulders should be relaxed and rolled back.
- Jewelry
Wearing jewelry on passport photos is allowed. However, they must not cover your facial features. Just to be safe, it’s best to remove them, especially if you have facial piercings.
- Clothing
You must wear decent clothing when taking your passport photos. Avoid wearing tank tops, or tubes. Also, any uniforms and camouflage are not allowed.
To be safe, it’s best to wear a top with a high neckline. Better yet, a collared top to make your passport photo look formal and presentable. Just avoid wearing the same color as the background, or you’ll end up looking like a floating head.
- Glasses
You should not wear glasses in your passport photo. This obstructs your facial features, which is a big no-no when taking a passport photo.
However, if you have a medical condition that prevents you from removing your glasses, you need to attach a signed medical note stating that in your passport application.
- Hair
Any hairstyle is allowed when taking a passport photo. Just make sure that it does not cover your eyes on the actual photo.
If you have long hair, tuck it at the back of your ears. If you have bangs, clip it back or use gel or wax to sleek it back. Again, make sure that all of your facial features are visible and unobstructed.
- Head Coverings or Hats
Wearing a head covering or hat for religious and medical reasons is acceptable as long as your full facial features are still visible. The head covering must not obscure your hairline. It should also not cast shadows on your face.
If you have to wear a head covering for religious reasons, attach a signed statement indicating your reasons. It’s also best to attach proof of your religion.
If you have a head covering or hat for medical reasons, you need to submit a statement signed by your doctor stating the reason. It should explicitly say that you cannot remove the said head covering due to a medical condition.
However, if you are just wearing it as a fashion statement, it’s best to remove it.
- Makeup
Makeup is allowed for passport photos. However, it must not change your facial features. In short, it’s better to go for a no-makeup look instead of a full glam.
General Steps on How to Remove and Change Passport Photo Background
Now that you have a clear idea about what are the passport photo requirements of China, the US, and European countries, let’s dive into the steps on how to remove or change photo backgrounds for passports. Here are its general steps:
1. Pick a Photo Editing Software
The first step is to look for photo editing software that has a background change feature. There is plenty of software with this feature, but the one you should pick must be convenient and easy to use.
In addition, it would also be great if your software is not expensive since it’s more likely that you will be editing a passport photo only once every 10 years. However, if you do have frequent needs to change the background of pictures for business or leisure, then go ahead and invest in more premium services.
2. Load Your Image
You then have to pick a photo that you want to remove and change the background. The photo must follow the requirement for a passport photo based on which country you will be using it for.
Make sure to follow the exact measurements given in the guideline for the size and height of the face. Also, make sure that the photo does not have imperfections such as shadow cast or blemishes. Your facial expression should also follow the requirements.
3. Cut Out the Background
This can be a bit time-consuming, depending on the photo editing software that you will be using. Most of the time, you need to manually change the background by tracking the outline of the image you uploaded.
4. Change the Color
Once you have cut out the background, the next thing you should do is change the color. Just fill in the background using the color according to the guideline.
5. Finalize and Download
In this step, do final touches, such as making sure that the edges of your picture are clean. After you are satisfied with the photo, download it, then print it on high-quality photo paper according to the size in the requirements.
Tool for Removing Background from Passport Photos
Removing background from passport photos manually can be quite tedious and time-consuming. Luckily, you have a tool such as Slazzer that enables you to remove it automatically. Here are the steps on how to use it:
1. Upload Your Photo
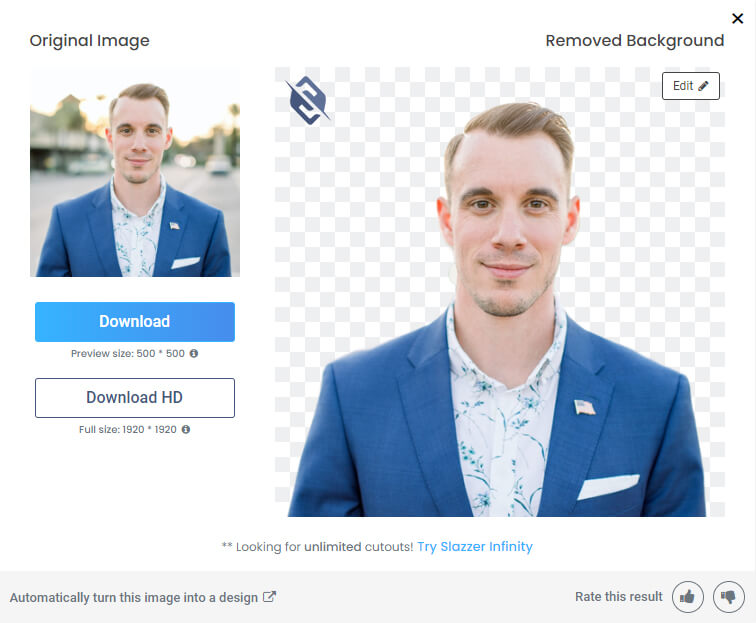
Upload your image once you are on the website. You can copy the image and press Ctrl + V or paste it on the site. You can also drag and drop the image to get it uploaded.
The website will automatically remove your photo’s background. You will see the result on the preview pane.
2. Edit

Once the background is removed, you can choose to edit the photo furthermore. Click on the “Edit” button. You can either edit the preview or the HD image. You can also choose to download the picture with the background removed.
You will be required to log in if you want to edit the HD image. You can do this after creating an account.
3. Pick Your Background
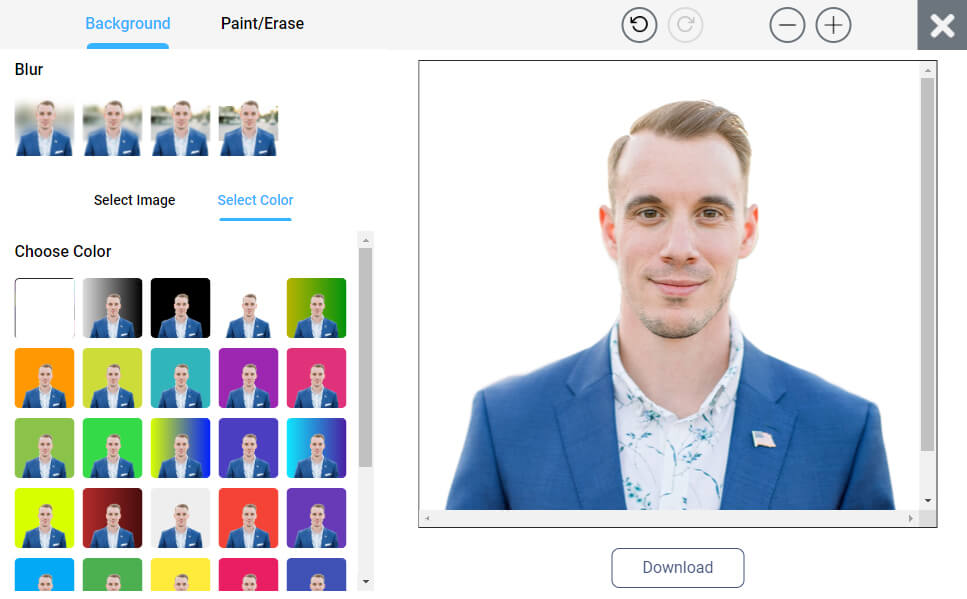
In the “Background” tab, you can choose from the templates given or upload your own. You can also select a plain color as required by your country. You only need to go to the “Select Color” tab and choose the appropriate color for the background.
4. Final Touches
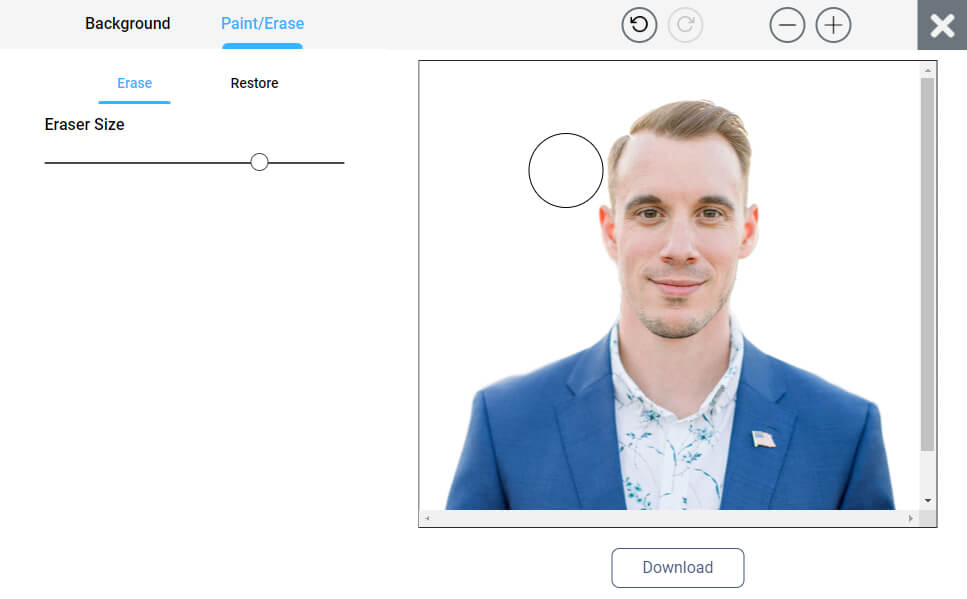
If you want to improve how the image’s background is erased, you can go to the “Paint/Erase” tab, choose the eraser size, and clean the edges of your photo. You can go to the “Restore” tab to undo your mistakes in using the eraser.
You can also click the buttons for “Undo,” “Redo,” “Zoom In,” and “Zoom Out” on top of the screen to make the editing process easier.
5. Download
Once you are done editing the image, click the “Download” button and save the image on your PC or gadget.
Final Words
It’s definitely possible to remove the background of your passport photo on your own. Simply follow the steps and tips mentioned above, and you are good to go.

Comments (0)