- Tips & Tricks
- Jan 30, 2022
Color Contamination in Photography-A Complete Guide
“The art of photography is all about directing the attention of the viewer.” – Steven Pinker
Taking visually appealing photos is a time-consuming art. It not only needs creativity and photography skills, but you also have to take care of color shades, combinations, saturation, and contamination. You probably have experienced color contamination quite frequently if you are into photography. Although the term might seem unfamiliar, we’ll explain it in a way that’s easy for you to understand.
Let’s dig into details of this topic to understand what role color contamination plays in photos and how it might affect the photographs.
What is Color Contamination?
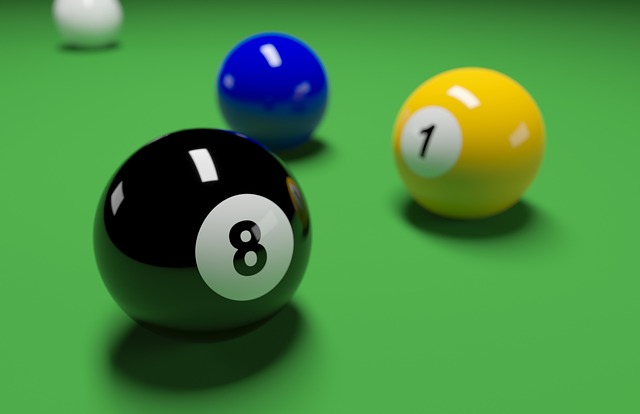
It is an issue that occurs when one color interferes with another and changes our perception of the shades. We can easily understand the term with a simple scenario. Let’s consider we’re taking a picture of two subjects, be it anything or anyone.
One subject has a lighter color, like white, and the other has a brighter color, such as blue. When color interference occurs, the blue color of a bright-colored subject interferes with its white counterpart and causes it to appear bluish. This is how colors blend with each other in normal photos if they are not taken with care.
How Does Color Contamination Affect Photographs?
Color contamination is not limited to the field of photography, as it is a phenomenon that occurs everywhere around us and appears to be a regular part of our life. Also, under usual conditions, the effect is too weak, sometimes even non-existent, to warrant our attention, and we prefer to ignore it and keep the picture as it is. However, it can be a real headache for the photographer when it occurs at its max.
Think about taking a picture of a person standing in a flower garden. While you think of taking an excellent shot with a great background, the hue of the flowers reflects onto the person and ruins the shot. Feels frustrating, doesn’t it? Having your subject lose their individuality and blend with the surroundings is a bit overboard. That’s why color contamination can be problematic.
You may be thinking that such a trivial matter can be corrected just by adjusting the white balance a bit, and you might be right when it comes to mild cases. But, white balance modifies the colors of the image as a whole; you won’t be able to get rid of the color spilling without affecting the rest of the image.
Use of Colors and Color Combinations in Photography
Colors play a fundamental role in defining the quality of images. They can be particularly complicated in photography, as we’ve discussed in our guide on sRGB vs. Adobe RGB vs. Prophoto RGB. Colors are the essential components of arts and one of the most impactful elements of any image. Any color combination in an image leaves a profound effect on the emotions and interests of the viewer.
Primary, secondary, and tertiary colors in the color wheel are mixed to make new colors, as we do with paint colors. You must be aware of how color schemes like monochromatic, analogous, and complementary schemes act as a game-changer for defining the quality of any image taken.
Complementary color schemes are widely used in the photography world because of the juxtaposition of these two shades (red and blue), which generate a bold contrast. Moreover, these colors balance the effect of each other in images. A few years back, the trend of using “teal and orange” shades in photos was observed. This combo got famous because these two colors were opposite yet complementary.
Another very classic color scheme is monochrome, in which we use a single shade in images to represent the details in any image.
“When you photograph people in color, you photograph their clothes. But when you photograph people in Black and white, you photograph their souls!” ― Ted Grant.
Objects in monochromatic images dominate and become softer, clear, and natural. The basic knowledge of these terms not only helps you take perfect shots but also helps you correct the colors of your images a bit in the post-processing of images.
What is Radiosity?
There is also a term called “radiosity.” Although it was used more frequently in the old film days, the term now represents the interference of light and colors on one another in virtual worlds. A significant milestone in the 3D building was to control the precise effect of light interference on the model’s surfaces when lying close to each other.
By definition, radiosity is a universal illumination algorithm used in 3D rendering. Unlike direct illumination algorithms that reflect light from each surface once, radiosity algorithms stimulate multiple reflections from each surface for a softer and finer reflection.
Although the 3D designers seem to like the phenomenon of radiosity as it gives the model a sense of realism, the same can not be said for photographers. For them, it is more of a problem rather than a boon, and you don’t want to take a picture of someone’s white-colored product and make it appear not so white.
Is This Knowledge Useful?
Color contamination is not a high-level technical term that is beyond your abilities. This phenomenon can change the way we take images. Have you ever noticed how people standing in populated areas get unclear, a little off-center, and contaminated in photographs? We did, and so you should as well. They take pictures where people wear different colored clothes, interfering with image quality.
As a result, people who take photos with monochromatic dark backgrounds get sharper results than those who take photos in a multicolored environment. We recommend taking images facing bright-colored objects, buildings, and sceneries.
How Can We Use This Information For Our Advantage?
Photographers can get enormous benefits by correcting the color contamination issues. There’s no limit to what a perfect background & surrounding area color can bring to the table.
One of the best ways to enhance and sharpen the image dimensions is to use gray/black colors in the shooting area. Large polystyrene boards manipulate the light effects and modify the object’s shape as needed.
It is recommended to put gray or black sheets in your bag while going on shooting anywhere because these two colors play a fundamental role in defining the quality of the image taken. You can also use a gray card to enhance the image definition.
Pro Tip: You can use a plain white sheet to cover the excellent light effects while taking photographs because color can bounce in the light and limit the color spill of the surrounding surfaces.
Impact of Staff’s Outfit
The staff needs to dress appropriately when taking photos. If not, the whole shoot can be ruined. Dressing up in a trendy and current style is not bad at all. The real problem is wearing sparkly, bright clothing while holding a bouncing board at a professional photo shoot.
While many novices don’t pay attention to what staff’s or photographer’s outfits can do with the images, others surely know how to play with surrounding colors to get that right image which can turn the tables.
Gray or light gray colored surroundings are the best options while shooting anywhere, especially the person who has to hold the bouncing board, and the photographer must avoid bright outfits while on the set.
You can take an example from the film industry. If you’ve ever visited any film shooting, you might have noticed that almost all staff members who control the light effect wear dark or light gray colored clothes.
Wearing the right outfits on the shooting set is an actual game-changer; it reduces reflection effects and contamination.
Tools to Edit Photos
Here are some tools which you can use to enhance the image quality further:
PicMonkey
You can edit, enhance, and modify the images through PicMonkey. It provides a diverse filter to sharpen the photos taken from the camera. It also provides the option to import images from different platforms like computers, drive, Facebook, and MyHub. Other effects such as blurring, wrinkle removal, spot-fixing, and blemish removal are available too. Additionally, you can naturally apply makeup and tanning effects to the images.
Slazzer
This platform is ideal for those struggling with the poor and blurry background of their photos or who want to remove it from a bulk number of images. Slazzer provides the options to remove, edit, and replace the background with simple, unicolor, or customized backgrounds. Their technology can be accessed through an API and automatically lets you remove background from images seamlessly in all programming environments and operating systems, including Windows, Mac, and Linux.
PhotoLemur
To develop your aesthetics in a few minutes, you can use Photolemur. This software does the job for you, so you don’t have to decide what changes you should make to an image without changing its quality. Photoleur provides different styles and templates to apply to the photographs as well.
Photolemur is a user -friendly and easy-to-use platform that is helpful to beginners who don’t know a lot about the post-processing of images.
Adobe Lightroom
Adobe Lightroom needs no introduction in the photography world. No photo editing software can match the level of lightroom; that’s why most professional photographers use this tool to tweak their photos a bit. You can modify and fix images on different devices as they can be downloaded on almost all existing devices. Lightroom enables photographers to do camera or lens-based editing. Moreover, its face detection technology to edit images raises the bar for other software.
Aurora HDR
Skylum is offering services of Aurora HDR to add a High Dynamic Range to the images after they have been captured. You can change image details by adding shadows, mid-tones, and highlights evenly in the picture. You can use this software for both images and videos to fix undesirable HDR effects and produce well-saturated images/videos.
Takeaways
- While taking pictures of objects, be mindful of the background and the surrounding surface color.
- Think about using a white wall instead of using other colors.
- If two or more products are placed nearby, you must take care of their color’s impact on each other.
- You can also use a Black/White sheet while shooting to cover bright-colored items when needed.
- Use dark or light gray cards for the studio.
- Don’t use a white bounce board for the studio shoots.
- Dark or Light Gray bounce boards enhance the shape of the product/subject.
- While shooting, ensure that the staff is not wearing bright-colored clothes; otherwise, it will interfere with the picture quality and cause contamination.
- Last but not least. Your outfit shouldn’t be overly colorful if you want to take eye-catching, clear photos.
Final Thoughts
After thorough research, we’ve concluded that the photographer who uses the approach to “Fix photos in softwares via filters” is at a loss. It not only takes time, but it is not that easy to fix the images through software. The white balance spectrum plays an important role.
Color contrast and contamination are some of the most profound topics in photography which can bring a lot of diversity to the images. Experts put a lot of effort into images to enhance the features of objects and art used in the photo. But the filters and editing sometimes fail to justify the image quality as the emotion and thoughts a photographer captures in a picture varies from the editors’ thoughts and perceptions.
Contrasts and warm-cool colors are important in photography because, at the end of the day, the image must appeal to the eyes of the viewer. To improve the quality of photos taken in the studio, you can also play with the background and surrounding color walls to get that perfect shot.


Comments (0)