- Tips & Tricks
- Nov 02, 2021
How to make a photo look like it is old and “vintage”?
Be it the vintage haute couture collection, famous tv show reboots, or celebs and influencers using old image filters to make pictures look vintage for their social media feeds….now more than ever the past is dominating every trend. But why are people choosing vintage and lo-fi styles in this digital era? The answer is simple – the vintage aesthetic produces a sense of nostalgia and timelessness that keeps us engaged and happy.
The photography industry is not left untouched by this recent trend, as a result of which different photo editing apps are coming with hundreds of retro filters for their audience to use. Photos with vintage effects also tend to get more likes on social media since it enhances and adds a new dimension to the photo composition while adding charm and preserving the natural feel of the image. So if you haven’t done it already, you should give vintage photography a try, using some of the features discussed in this article.
Features of Vintage Look
Before starting the editing process, let’s dive in and learn a few of the features that will help you in achieving the perfect vintage aesthetic in your photographs.
Low Contrast
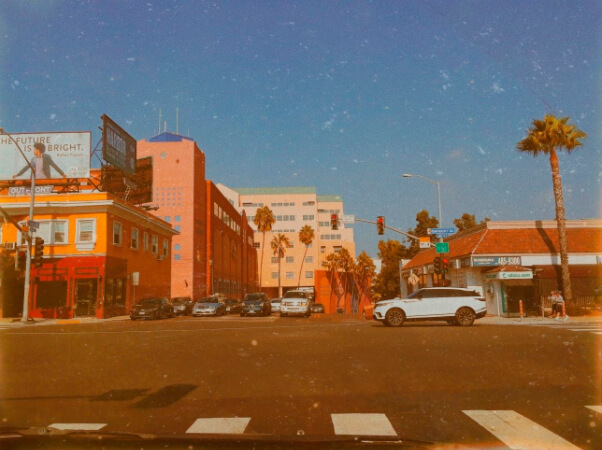
While looking at the old photographs of your grandparents, you must have noticed the edges of the picture look faded and bleary. This happens because of low contrast causing light and dark areas of a photo to blend and mute all the colors, creating a flat picture. By decreasing the contrast and slightly increasing the brightness, you can have the perfect old faded look for your image.
Noise
Since digital photography cameras were not available in the yesteryear, photographs were taken using films. The film had a fixed ISO, which caused grainy images and a lot of visual distortion also known as Noise. The grain on old photos can be faked easily today by adding digital noise to the prints.
Low Color Saturation
Each film in old cameras had a different color cast. However, because the cameras were not powerful, the photos came out looking washed out. Also, color photos don’t age well like black and white photos, which is why they start losing contrast with time. So an easy step in making your snap look retro is to reduce the saturation along with the contrast. If you are still not satisfied with the results, you can eliminate all the colors from your photo and make it black and white.
Vignetting
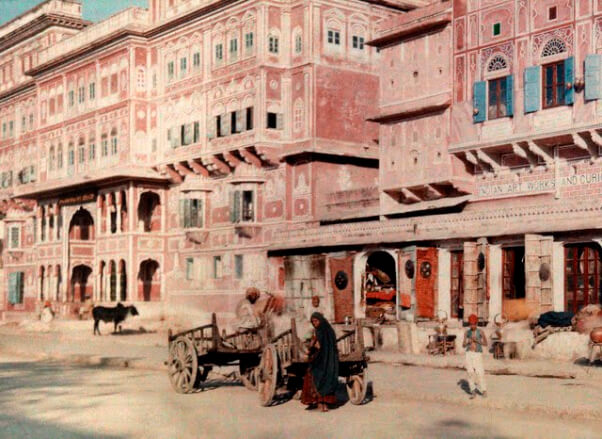
A vignette is a blur or silhouette that reduces the brightness or saturation around the perimeter of the image, creating a frame around it. In addition to giving the print a dramatic quality, the Vignette also enhances the center subject.
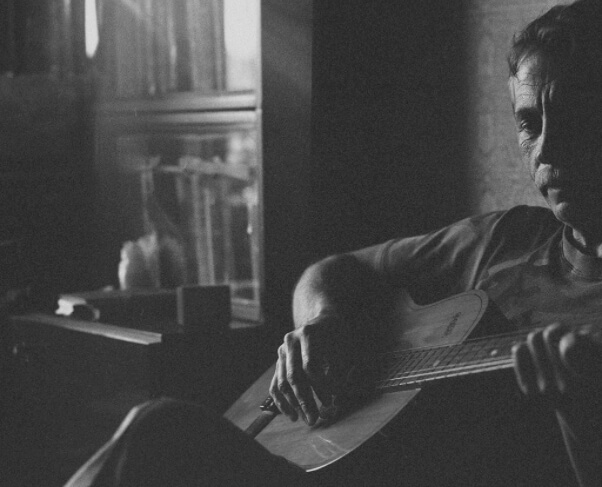
You can create a Vignette by darkening the fringes of the photo while keeping the subject brighter and in focus.
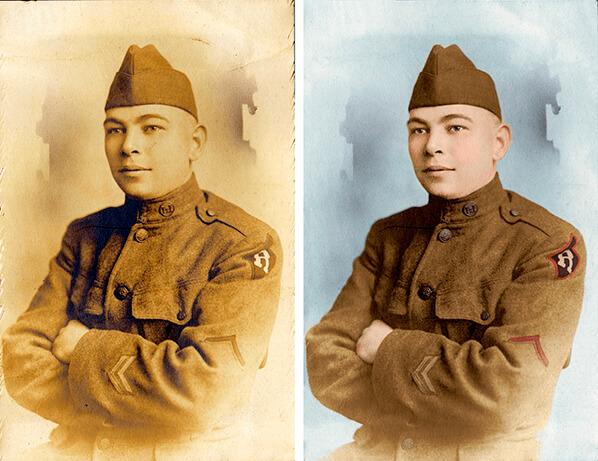
Tint
When old photos get exposed to UV light and high temperatures, they can become tainted over time. For instance, a black and white picture will start appearing brown because of a yellow tint that was not there originally. You can recreate this effect simply by adjusting the colors to more yellow or red in software like Lightroom or Photoshop. You can try the cool blue tones for a Victorian-era-inspired impression or the red tones for a 70s classic look.
Editing your Photo to make it look Vintage
Though it may sound laborious, it’s simple to transform your new photograph into an old-fashioned, vintage photo. Many softwares will help you achieve a vibrant retro look, but since we don’t want to confuse our readers, we will focus on one of the primary image editing software that will help produce a variety of vintage looks in no time.
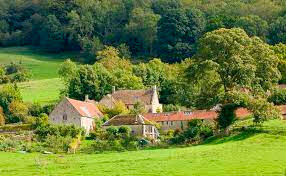
Manipulating the Background of the Image
It is also vital to ensure that the background of your image is coherent with the subject you are photographing to achieve the retro-style effect. To make sure that the backdrop looks just as compelling as the subject, make sure to shoot the pictures in a historical location, untouched by modern architecture.
If you cannot find such a location, do not worry and leave the rest to the Slazzer- the perfect photo background changer.
You can upload your photo on the Slazzer website, and it will remove the image background automatically in just one click.
Once the background is removed, and you get a transparent image, select the Edit option, and it will open up a new dialog box. In this box, you will find the option to change your image background.
You can choose from several available backgrounds on the website, or add a background of your choice by uploading it on Slazzer.
Satisfied with the results, you can now download the photo and further edit it in Photoshop.
Slazzer also provides a Photoshop plugin that you can install directly in the software and use to cut down your editing process.
Vintage look using Adobe photoshop
In Photoshop software, open the file that you want to edit.
Step 1 -Converting Background Layer Into A Smart Object
- Open the image you want to work on and go to the Layers panel
- Click on the menu icon on the top right side
- Choose Convert to Smart Object
You will notice the Smart Object icon in the preview thumbnail.
Step 2 – Camera Raw Filter
- Go to Filter menu
- Select Camera Raw Filter
It will open up the Camera Raw Filter Dialog Box with the image appearing in the preview area.
Step 3 – Converting The Color Image To Black And White
By default, the Basic panel will open up, select the B&W Mix panel from the Treatment section and convert your color image to black and white. You can also adjust the color by dragging the individual color slider.
Dragging the slider of any color to the left will darken that color in the image while sliding it to the right will increase the lightness.
Step 4 – Split Toning
Now add a sepia tone by going to the Split Toning section( right of B&W Mix tab). The Split toning is divided into a Highlights section at the top and a Shadow section at the bottom. In the Highlights section, increase the hue to 40 and saturation to 20 to give a yellow-orange tint to your image.
Put the hue at 45 in the Shadow section, and the Saturation at 50 for a dramatic effect.
Step 5 – Adding Effects
Add grains and vignette effects to your image by going to the Effect panel. It has two options – Post-Crop Vignetting at the top, Grain at the bottom. Play around with these options and see which setting you like the most for your image.
Step 6 – Basic Panel
Our editing is almost complete. Now lower the overall contrast to make the image more faded. Go back to the Basic panel and tone down the Highlights by sliding the adjuster in the left direction and increasing the Shadow by sliding the adjuster in the right direction.
Finally, adjust the Clarity by dragging its adjuster to the left. Remember not to overdo it, or else you will lose too much detail.
After the editing is complete, Click OK to close the Camera Raw Filter Dialog Box.
There we have it, our old retro effect. You can notice how this effect adds meaning and depth to the visual content. In case you want something easy, there are many presets available that you can buy. But to get better results, select a good photo editor along with Slazzer online automatic background changer, that allows you to work with layers and gives you creative freedom while editing the image. By fine-tuning each adjustment with hand, not only will you have complete control over your image, but you can also create unique effects.

Comments (0)