- Tips & Tricks
- Dec 06, 2021
Simple and Easy way to Change Background from Hair Using Photoshop
If you are in the designing or photography industry, removing backgrounds from images is likely one of the greatest challenges you face on a daily basis. You can spend hours perfecting that process, and still, the picture will come out distorted.
The process becomes even more tedious when the hair of different models in shoots needs to be cautiously removed from the background. Without the basic knowledge of Photoshop tools, the situation can worsen. The purpose of this article is to provide you with all the information you need on how to remove background in photoshop by using the Background eraser tool or the Slazzer Photoshop extension. As soon as you master this skill in Photoshop 2021, you can spend more time enhancing your creativity rather than manually selecting and erasing backgrounds.
We have put together a step-by-step Photoshop guide, to help you learn how to remove the background in Photoshop from hair.
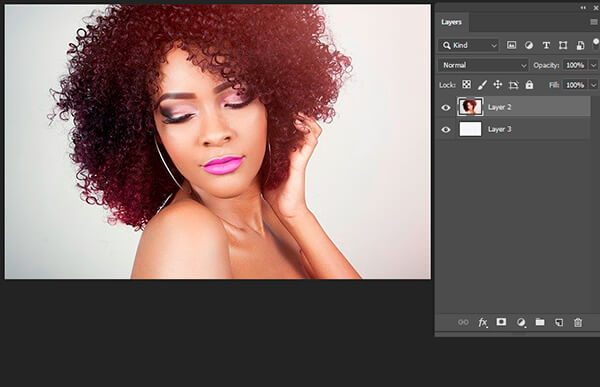
Step 1 – Set up your Layers
Open Photoshop, select the image that needs editing, click on Window > Layers, or go to the Layers panel icon on the right of the screen to get to your layer panel.
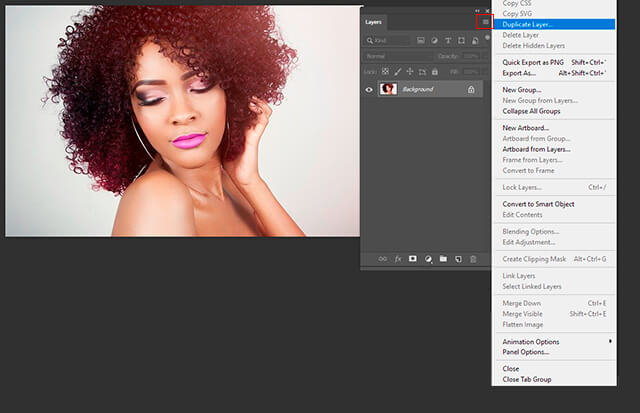
In the layer panel, you will find the locked Background layer selected by default, click on the three little lines on the upper left-hand corner, there will appear a drop-down menu. From that menu, choose the Duplicate Layer option.
You can preserve your original image in the event of any mistakes by using a duplicate layer, which allows you to redo the editing without a problem.
A pop-up box will appear, select Ok to create the Background copy layer.
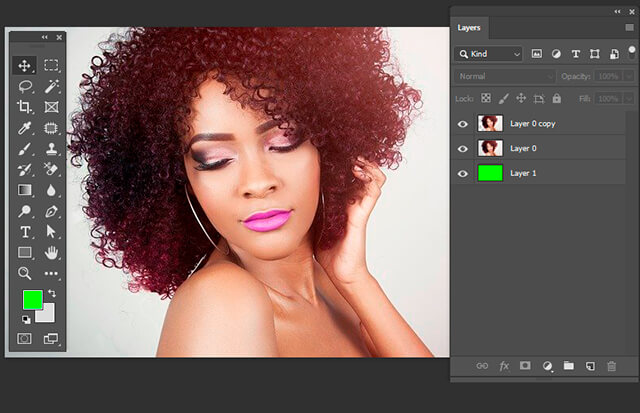
Step 2 – Creating a High Contrast Layer
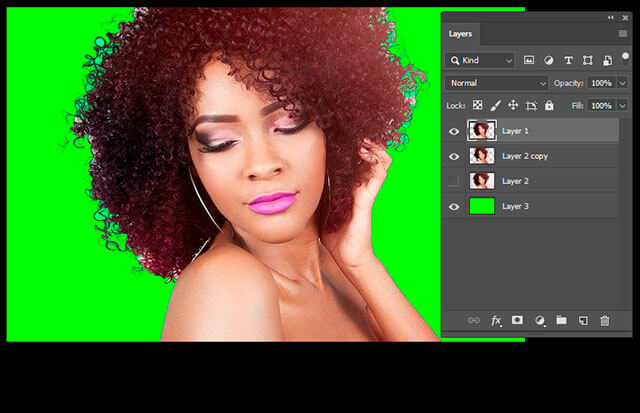
At the bottom of the Layers panel, click on the plus sign to create a new layer.
Image showing a high contrast Layer
In your Toolbar section, double-click on the Foreground color to bring up the color dialog box. Once it opens, choose a color that is in high contrast in comparison to the background color of your original image.
We use bright colors in the foreground as it’s easier to remove hair background in Photoshop.
After selecting the right color, Select your new layer and choose Edit > Fill from the top bar, or you can use shortcut keys – Shift + F5 (Fn + Shift + F5 on a Mac). Once the dialog box opens, choose the Foreground color at 100%.
Step 3 – Erasing the Background from hair
Go to the Toolbar and Select the Background Eraser Tool, which is under Eraser Tool.
Then from the toolbar, select the Background color and click on the background color of the image. The color can be selected using the Color Picker in the pop-up dialog box.
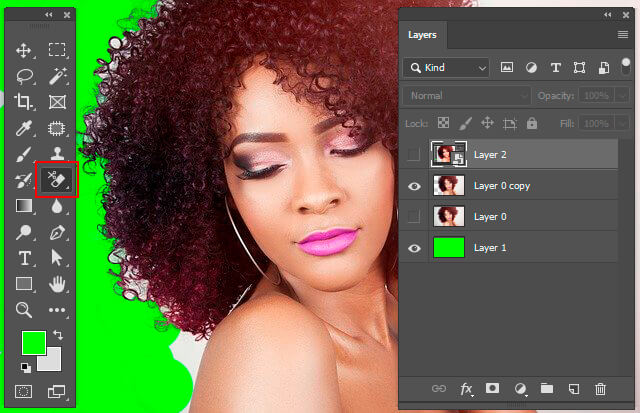
After you have selected the Background Eraser Tool in the Tools panel, you will find three little buttons near the brush size in the Options bar. These will determine how the background will be sampled – whether it will be Contiguous, Once, or using a Background Swatch. Since we have already selected a solid bright color background, choose the third option: Background Swatch.
To ensure that the top layer remains separate from the bright color background layer so that hair cutting photo editing in Photoshop is easier, make sure that the Discontiguous and Protect Foreground Color are selected.
The other two options to be selected are -: The Brush Preset that will determine the brush size that makes the most sense for the image and Tolerance, which needs to be 50%.
Check in the layer panel and make sure that in the top layer, Background Copy is selected.
Select the Background Eraser Tool and start erasing the area around the hair. There can be instances where you will need to adjust the Tolerance level depending on the Foreground image. To have more precision on the area around the hair, reduce the brush size.
Keep on working till you have an “outline” around your entire subject.
After the area around the hair has been selected carefully, the Brush Size and Tolerance Level can be increased to remove the rest of the background more quickly.
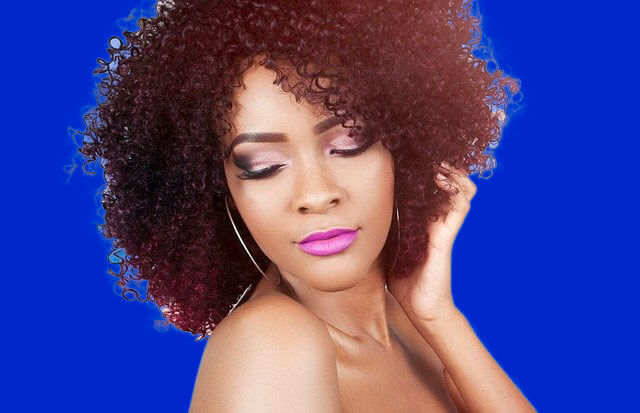
Step 4 – Replace the Background
In the Layers panel, hide the bright color panel and the original Background layer by clicking on the eye icon that you will find next to each layer.
Now you will have an image with a transparent background. You can use any background behind it to experiment and further master your skills, or you can copy the image and paste it into some other backdrop of your desire.
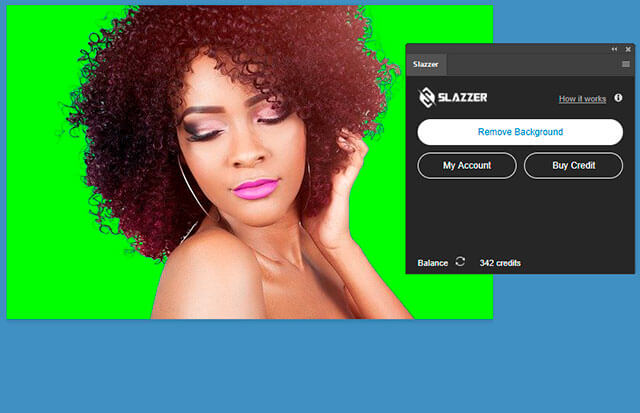
Slazzer Photoshop Extension
Alternatively, you can download the Slazzer extension directly in Photoshop. Just click “install Slazzer” and a new menu will open up named “Window”, then select “Extensions” and then “Remove Background”. You will need an active API key to use it and the button will always be available anytime you need it as you work in Photoshop. With just one click its AI will cut out the most complex hair with fine precision, 100% automatically, without manual intervention, in just a few seconds.
Following these steps will simplify the process of removing backgrounds from hair and save you considerable time and effort. The time saved can be devoted to experimenting with different backdrops for any image. Feel free to try new hair photography ideas every day, each with different beautiful backgrounds without fear of destroying the image while editing.


Comments (0)